Chapter 1: Introduction
Poor Simon Sinek! His audio doesn’t match his moving lips!
No matter if it is too many uhms and ahs or mismatched audio, a couple of quick fixes can help. Over the next couple of Chapters, we are going to let the experts on the Camtasia help desk show us how to do some simple editing. Of course, these same tips can be used with your video editing software too!
First, let’s talk about some background information about all video editing software. It is based on the concept of layering. There is a layer for sound, another layer for video and more layers for other special effects. How you arrange these layers and what you ask each layer to do will determine what your final masterpiece looks like.
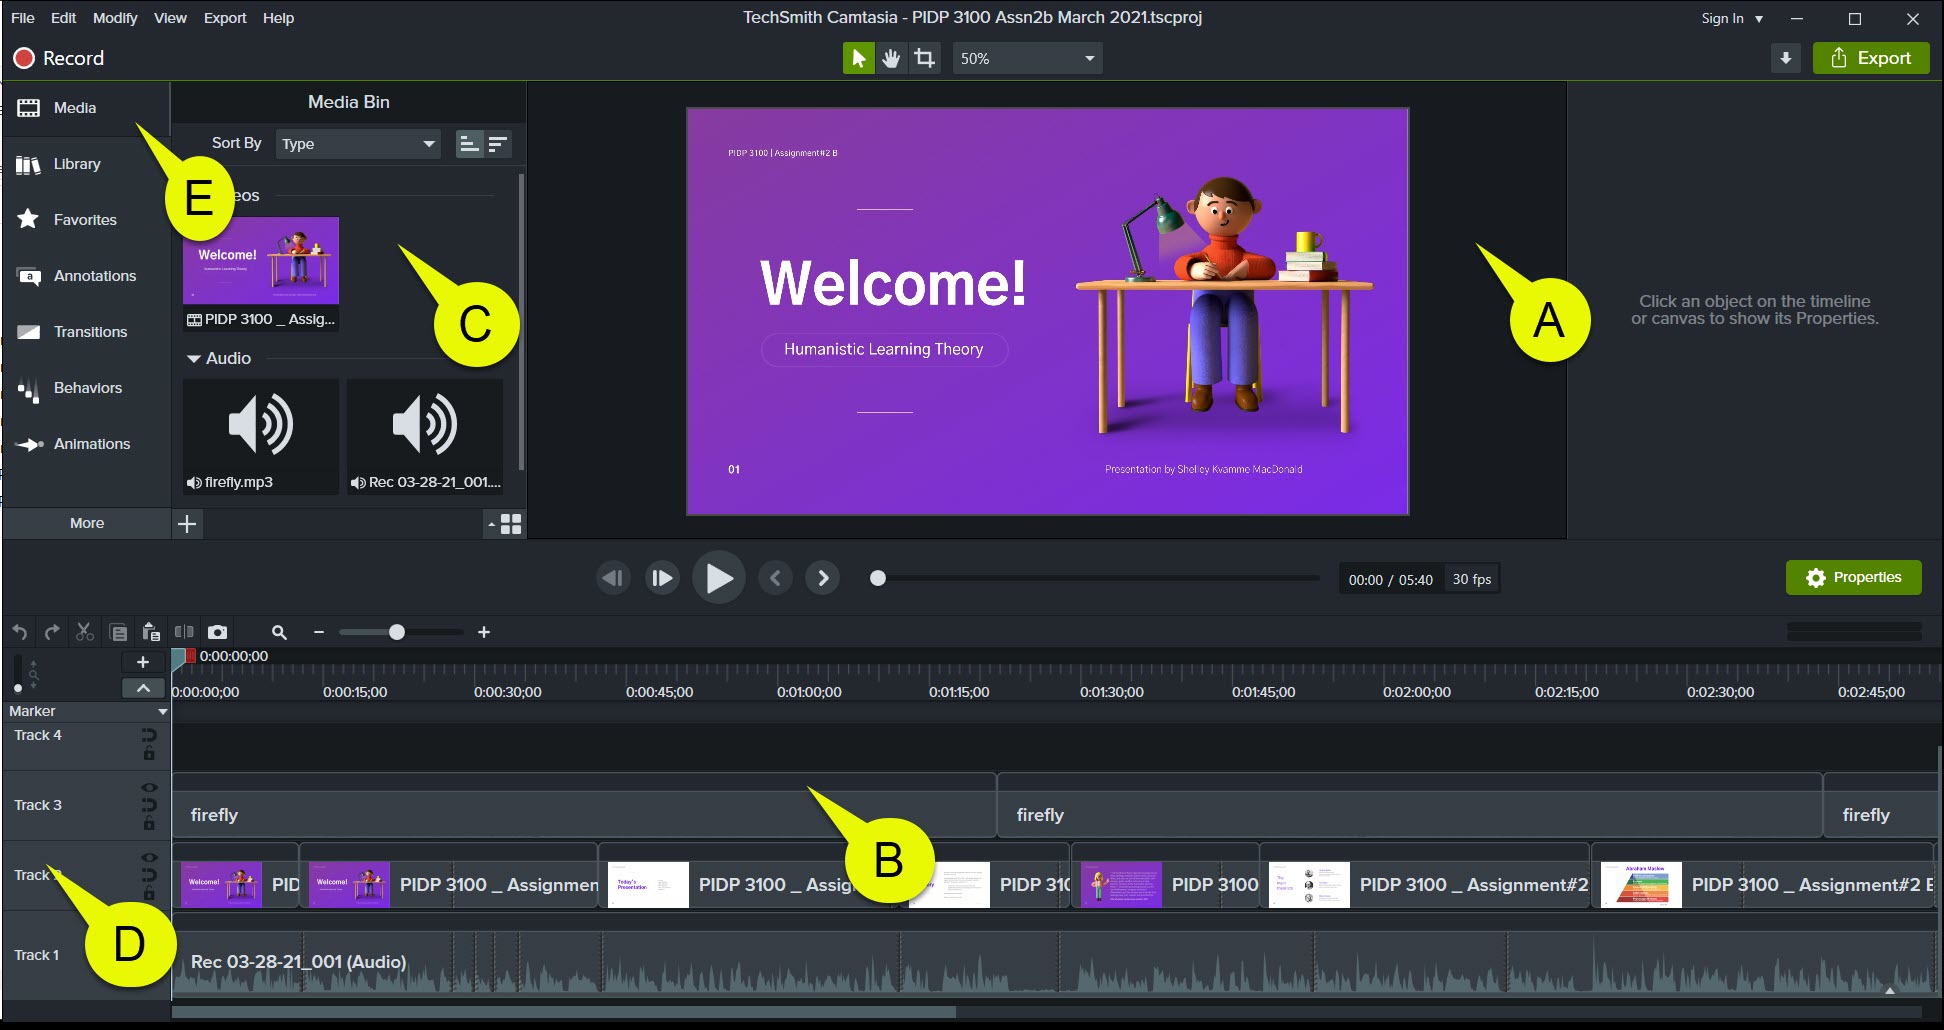
As you can see from the Camtasia page above, there are a number of different areas. Some are areas where your masterpiece is being displayed and some are where you can perform work on your masterpiece. Different video editing programs will call these areas different names. What are the various parts I have labelled above?
A – This is where you can see your masterpiece as it is being built
B – This is where the different layers are shown so you can work on them
C – Here is where you can put the various media you are working with – other audio or video that will be used in your masterpiece
D – Here are the layers. You can make them taller or shorter or even lock them so no changes can be made while you are making edits elsewhere
E – These are your standard menu items
Let’s see how to do some basic video editing in this next video.
Some key ideas to remember:
- the different areas where you can work on your masterpeice could be called by different names in your video editing software but they will have the same purposes
- the timeline is organized into layers, where you can add the audio, video and special effects you want. It works from left to right.
- the track (layer) on the top shows on top of the layers below it
- what you see on the canvas (display) is what will appear on your final video
- to remove a mistake or a portion, position the playhead at the start and drag the red portion of the playhead to the end of the area you want gone. Click on the scissors to remove that section. All the media to the left will move over to close the gap
- if you want to remove the selected media but leave a hole where the media was, then select the area as above. Press the delete key. A space will be left and you can add in another media clip.
- if you want to add space in the timeline, move the playhead to the start of where you want the space and select the clips where you want the space to appear. Press the S key on Window or Cmd+T on Mac. This will split the section and you can click and drag your media to where you want it.
- you can trim your media by clicking and dragging the end of the media clip you want to change
Great job! Let’s go to the next Chapter to learn about editing audio!
0 Comments